Has your computer gotten stuck in the endless reboot loop cycle? If yes, we can help you in that case and fix the “preparing automatic repair windows 10” in a hassle-free manner.
In this post, I have pointed out why automatic repair loops occur, what the causes are, and how you can fix them. So, make sure to stick to end to understand everything.
Why does Automatic Repair Windows 10 Occur?
The Repair tool automatically starts working when the system isn’t able to boot again and again. Due to this, it triggers the preparing automatic repair windows 10. As the end result, your computer will be stuck in the boot loop situation.
Causes of Automatic Repair Loop:
There can be a handful of reasons why this problem occurs, here are a few of them!
- You might have not updated to the latest version
- Some system files get corrupted due to viruses.
- The primary Windows Boot Manager files get corrupted.
- Incompatible hard drives are also a major reason.
In the following part, I have covered six methods from which you can smoothly solve the automatic repair loop on Windows. With that said, let’s begin the conquest.
Method #1: Run Fixboot and Chkdsk Commands
If you are facing the problem of automatic loop on Windows 10, then the first thing you can try out is a low-level system check by Fixboot and Chkdsk commands.
There’s a high chance that you might not be able to access the command prompt due to that issue. So for force the Windows OS to boot into the command prompt box.
Here’s the list of steps to fix preparing automatic repair windows 10 problem.
- Firstly, you have to restart the PC.
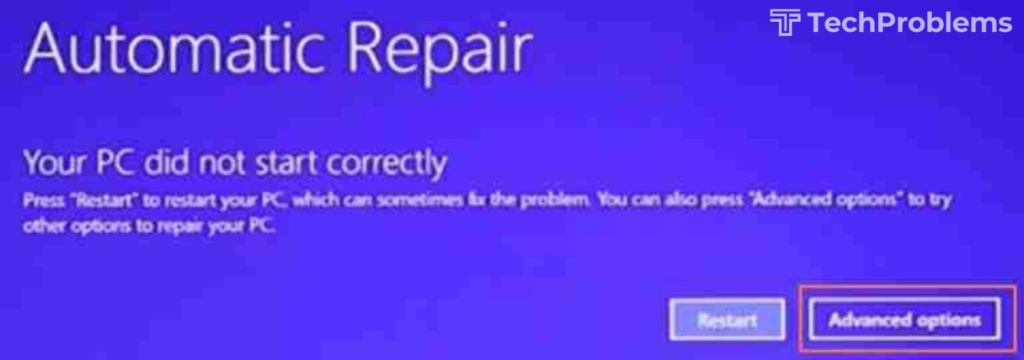
- Press on the F8 key before the screen didn’t show Windows logo.
- Now, you have to click on the See Advanced Repair Options.
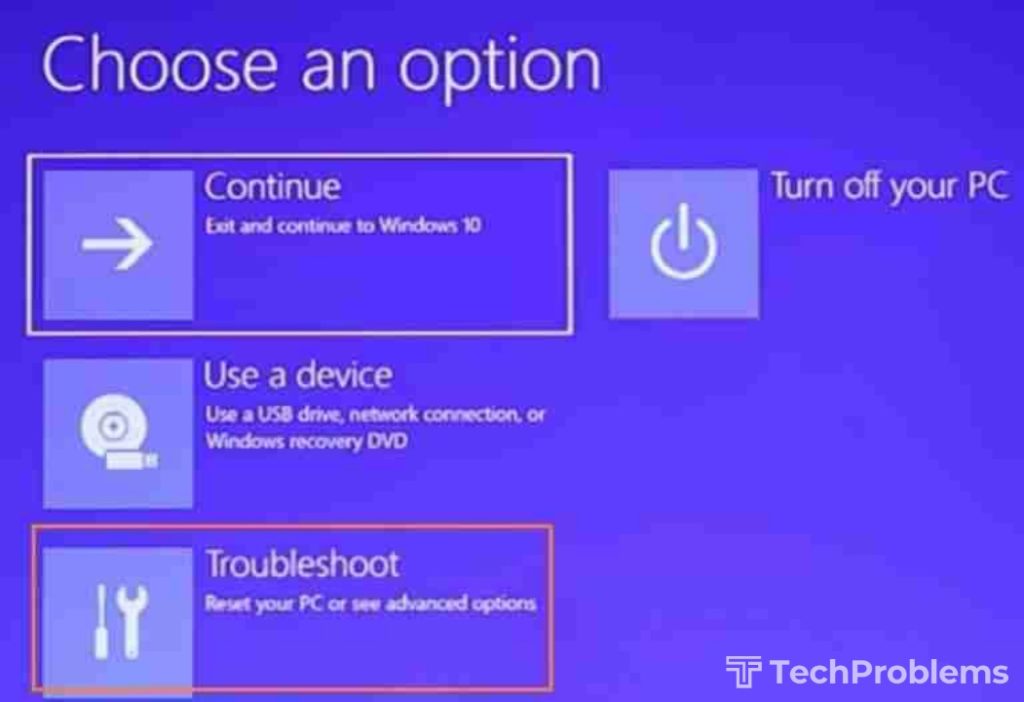
- In the following section, tap on the Troubleshoot option.
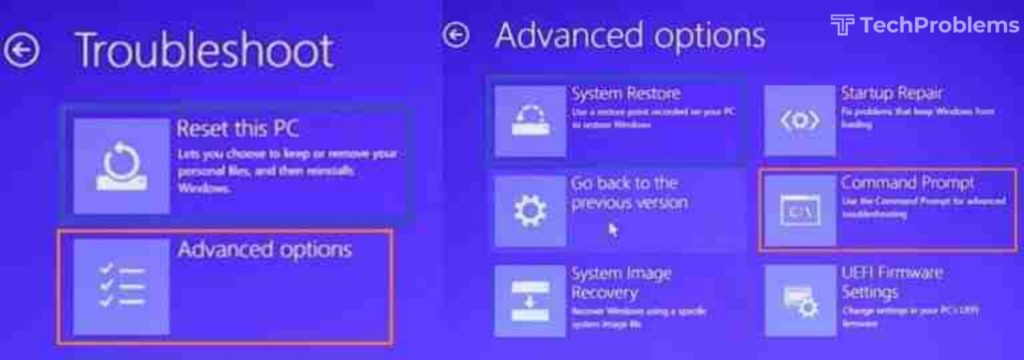
- Next, you have to choose the Advanced Option choice.
- Afterward, head toward the Command Prompt button.
- Inside the command prompt, type “chkdsk c: /r” and press Enter.
- For some reason, if this command fails to work, apply next command.
- Again, type the command “fixboot c:” and then hit on the Enter key.
- After all the steps are finished, come outside the command prompt screen.
- Finally, you can restart the computer/laptop like you used to know.
If this method didn’t work out for you, there are still five more ways remaining. So, let’s jump to next the solution to precisely fix the automatic repair loop on Windows 10.
Method #2:Disable Automatic Repair Tool
You can turn off the Automatic Repair tool from the advanced settings options, here’s the method to apply the necessary command to fix Repair loop problem with no issue.
- Launch the Windows troubleshooting menu
- Tap on Advanced Options → Troubleshooting → Advanced options
- Inside this menu, you have to open the command prompt.
- Apply the following command “bcdedit” and hit Enter to start.
- The value of identifier will be {default} and recovery enabled be Yes.
- If both of the values are similar to the above format nothing to worry about.
- Now, type the “bcdedit /set {default} recoveryenabled no” command.
- This command will disable the repair tool, if it does not work, try the next step.
- You have to enter “bcdedit /set {current} recoveryenabled no” command.
- Afterward, reboot the PC and check whether the issue is resolved or not.
Method #3: Restore the Windows Registry
If the above method doesn’t show any major improvement, you can also restore the Windows Registry to fix preparing automatic repair windows 10 problem.
With this, you can easily clean harmful software and remove corrupted files without much hassle. So, here are some steps to restore the Windows registry in the best way.
- As usual, you have to enter into the Windows Troubleshooting menu.
- Click on the Advanced options button and then Troubleshoot.
- Insides this, press on Advanced options and then command prompt.
- Type “C:\Windows\System32\config\regback* C:\Windows\System32\config\” hit Enter.
- If the system asks to overwrite files, you have to type All and press Enter.
- Now, simply reboot the computer and check the issue is fixed or not.
Method #4: Enable Safe Mode to Scan System
Safe mode in the Windows ecosystem works as an impressive tool because it helps in removing incompatible software, uninstalling problematic files, and many more things.
- Restart the PC and press F8 to launch Windows Troubleshooting menu.
- Go to the Advanced options → Troubleshooting → Advanced options.
- Next, you have to tap on the Startup Repair option and then click F5.
- With this, the computer will boot into safe mode without hassle.
- Now, right-click on the start button to access Windows PowerShell(Admin).
- Inside this, input “DISM /Online /Cleanup-Image /RestoreHealth” and press Enter.
- It takes a few minutes to finish the DISM tool command to clean up.
- Afterward, reboot the PC, and again launch Windows Powershell.
- Apply the following command “sfc /scannow” and press on the Enter.
- It will scan Windows system files and notify users that repair is complete.
Method #5: Reset Windows 10
Even after applying lots of commands, you still didn’t see any specific progress to fix preparing automatic repair Windows 10, you can reset the Windows 10 precisely.
- Firstly, you can restart your windows computer/laptop.
- Then, press F8 to access Windows Troubleshoot menu.
- You have to enter into the Troubleshooting option present in the list.
- Next, you will notice the Reset this PC choice, click on that!
- With this, the computer will get into the default settings.
Note: There’s a slight chance that preparing automatic repair windows 10 problem might not allow you to reboot. In that case, you have force shut down the PC.
Method #6: Reinstall Windows 10
As the last resort, you can try reinstalling Windows 10. With this, everything will clean up thoroughly and you will acquire a seamlessly smooth user experience precisely.
- Initially, you have to head toward the Start menu.
- Now, access the Settings application and open it.
- Following this, you have to select Update & Security tab.
- Inside the update & security tab, pick the Recovery option.
- In the Reset this PC choice, tap on the Get Started button.
- Lastly, the system will ask to Remove everything, click on it.
- With this, you have successfully reinstalled Windows 10.
Final Verdict
Kudos! You have fixed the preparing automatic repair windows 10 problem. Now, you can utilize your computer like you used to be before. Start your work without hassle.
I hope that this article provides a great value to solve the problem. You can also share this post with someone who is suffering from preparing automatic repair windows 10.