Android’s ability to run multiple apps simultaneously is a key productivity feature. However, stock settings, low memory, or OEM restrictions can throttle background processes, closing apps prematurely. This comprehensive 1,500-word guide explores why multitasking limits exist and offers 12 proven fixes—ranging from simple settings tweaks to advanced custom ROMs—so you can keep more apps open and switch seamlessly between them.
Why Android Imposes Multitasking Limits
Android manages memory and battery by restricting background processes:
- RAM constraints: Older or low-RAM devices can’t hold many apps in memory.
- Battery preservation: Limiting background apps reduces CPU wakeups and power draw.
- OEM customization: Manufacturers may impose aggressive app-kill policies for smoother “snappy” performance.
- Security and stability: Fewer background processes decrease the risk of crashes or exploits.
While these safeguards help battery life and stability, they frustrate power users who need to keep multiple apps active.
Enable Developer Options and Adjust Background Process Limit
Why This Helps
Android’s hidden Developer Options include a setting to override default background process limits, allowing more apps to stay resident.
Steps
- Unlock Developer Options:
- Go to Settings > About phone.
- Tap Build number seven times until you see “You are now a developer.”
- Access Developer Options:
- Return to Settings > System (or Additional settings) > Developer options.
- Adjust Background Process Limit:
- Scroll to Apps section > Background process limit.
- Choose Standard limit or select No background processes for testing.
- Reboot and Test:
- Restart your phone to apply changes.
- Open multiple apps in sequence and switch between them to verify they remain active.
Tip: Setting Standard limit ensures as many processes as possible stay alive, but monitor battery life and responsiveness.
Use Third-Party Launchers with Custom Multitasking Features
Why This Helps
Many launchers include enhanced multitasking tools—floating widgets, windowed apps, and memory cleaners.
Recommended Launchers
- Nova Launcher: Offers custom gestures and “Open in floating window” via plugins.
- Microsoft Launcher: Integrates timeline and seamless task switching.
- SquareHome 3: Tile-based interface with peek-and-pan features.
Steps
- Install Your Chosen Launcher from the Play Store.
- Set as Default Home App:
- Go to Settings > Apps & notifications > Default apps > Home app.
- Explore Multitasking Options:
- Nova: Use Tasker + TeslaUnread to open any app in a floating window.
- Microsoft: Swipe up on a tile to reveal recent items.
Bonus: Many launchers can auto-kill unused apps after a custom timeout, balancing multitasking and memory.
Employ Split-Screen and Floating Windows
Why This Helps
Android 7.0+ supports split-screen, and some OEM skins add pop-up view or freeform windows for true multitasking.
Steps for Stock Android
- Open Recent Apps: Swipe up and hold (or tap Recent).
- Tap App Icon on the card > Split screen.
- Select Second App to fill the other half.
OEM-Specific Floating Windows
- Samsung One UI: Long-press app in Recent > Open in pop-up view.
- MIUI: Swipe from corner with two fingers to open in floating window.
Pro Tip: Use Good Lock’s MultiStar module on Samsung for free-form windows and multi-instance apps.
Free Up RAM by Closing Background Apps
Why This Helps
More free RAM reduces the likelihood Android will kill background processes under pressure.
Steps
- Open Recent Apps and swipe away unused apps.
- Use Built-in Memory Manager:
- Settings > Device care > Memory on Samsung.
- Settings > Storage & memory > Memory on stock Android.
- Schedule Automatic Memory Cleaning:
- Samsung: In Device care > Memory > Auto memory clean.
- Third-party: Install CCleaner or SD Maid for scheduled cleanup.
Warning: Avoid “task killer” apps that promise RAM freeing—Android manages memory more efficiently than most cleaners.
Manage Battery Optimization and Power Saving Settings
Why This Matters
Battery saver modes often throttle background processes to extend life.
Steps
- Disable Battery Saver:
- Settings > Battery > Battery Saver > toggle Off.
- Adjust App-Specific Optimizations:
- Settings > Battery > Battery optimization.
- Select All apps, then choose critical apps and set to Don’t optimize.
- Turn Off Adaptive Battery:
- Settings > Battery > Adaptive Battery > toggle Off.
Note: Disabling these features trades battery life for better multitasking—monitor battery drain accordingly.
Optimize Memory with Lite or Go Apps
Why This Helps
Lightweight “Go” editions use less RAM, leaving more memory for multitasking between full-featured apps.
Examples
- Facebook Lite instead of Facebook.
- Google Go, YouTube Go.
- Files by Google for storage management.
Steps
- Identify Heavy Apps:
- Settings > Apps & notifications > See all apps > sort by Memory.
- Replace with Lite Versions:
- Uninstall the full app; install the Lite or Go edition.
- Verify Memory Gains:
- Check free RAM in Settings > Memory.
Insight: Many Lite apps also reduce background data usage, further preserving resources.
Use Task Manager and Automation Apps
Why This Helps
Automation tools let you preload, freeze, or prioritize apps based on time, location, or conditions.
Recommended Apps
- Tasker: Use AutoInput and AutoTools to automatically reopen or pin apps.
- MacroDroid: Trigger actions like “If screen on between 9–5, keep App X in foreground.”
- Greenify: Hibernate seldom-used apps to free memory (requires no root on newer Android).
Example Tasker Profile
- Event: Screen turns off.
- Action: Close all non-whitelisted apps.
- Event: Screen turns on.
- Action: Launch whitelisted apps in split-screen.
Warning: Complex automation can introduce instability—test each macro thoroughly.
Keep Software Updated
Why Updates Matter
Android patches often include memory management improvements and bug fixes that enhance multitasking.
Steps
- System Updates:
- Settings > System > System update (or About phone > Software update).
- Security Patches and OEM Firmware:
- Check Settings > About phone > Build number for patch level.
- App Updates:
- Open Google Play Store > Profile > Manage apps & device > Update all.
Hint: Beta or developer preview builds may introduce memory leaks—stick to stable releases if multitasking is critical.
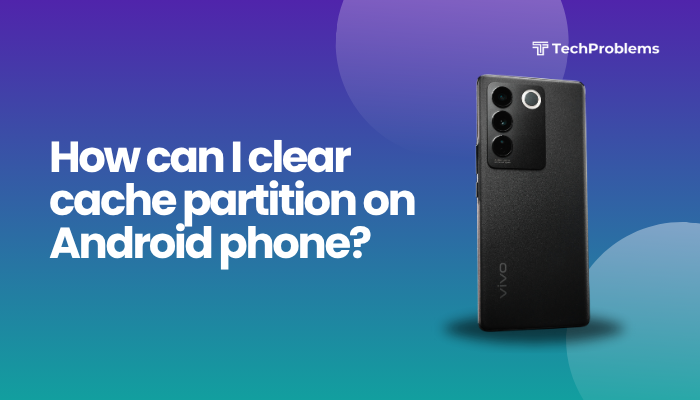
Clear Cache Partition
Why This Helps
A cluttered system cache can degrade performance and memory allocation.
Steps (Stock Android)
- Power Off your phone.
- Boot to Recovery: Hold Volume Down + Power (varies by OEM).
- Select Wipe cache partition with volume keys and confirm with power.
- Reboot system now after completion.
Note: This process does not erase personal data—it simply rebuilds temporary system files.
Root and Apply Custom ROMs for Advanced Control
Why This Helps
Custom ROMs like LineageOS, Pixel Experience, or Paranoid Android remove OEM bloat and often include advanced memory-management features.
Steps
- Unlock Bootloader:
- Enable OEM unlocking in Developer Options.
- Use fastboot oem unlock (commands vary by device).
- Install Custom Recovery:
- Flash TWRP via fastboot flash recovery twrp.img.
- Flash Custom ROM and GApps:
- Download ROM ZIP and GApps package.
- In TWRP, Wipe > Advanced Wipe > select Dalvik/ART cache, Cache, System.
- Install ROM then GApps.
- Reboot and Configure:
- Explore ROM settings like Memory tweaks, ZRAM, and Aggressive doze exceptions.
Warning: Rooting and custom ROMs void warranties and risk bricking. Proceed only if comfortable with advanced Android tinkering.
Factory Reset to Remove Bloatware
When to Use
If built-in bloatware or misconfigured OEM settings severely limit background processes, a clean slate helps.
Steps
- Backup Data: Google Drive, Photos, SMS Backup & Restore.
- Factory Reset:
- Settings > System > Reset options > Erase all data (factory reset).
- Reconfigure Carefully:
- After reset, install only essential apps.
- Avoid heavy vendor-preinstalled apps that reintroduce restrictions.
Tip: Consider using Minimal ADB & Fastboot to remove unwanted system apps (adb shell pm uninstall ––user 0 com.vendor.app).
Consider Hardware Upgrades or a New Device
Why This Matters
At some point, hardware limits (e.g., 2–3 GB RAM) cap multitasking capability, regardless of software tweaks.
Recommendations
- Upgrade RAM: Some flagship Android models offer 8–12 GB RAM.
- Choose 5 G/ UFS 3.1 Storage: Faster storage speeds improve app launch and memory swap.
- Look for Desktop-like Features: Samsung DeX, EMUI Multi-Screen Collaboration, or OnePlus PC Connect for enhanced workflow.
Note: Evaluate trade-offs like battery life, screen size, and price before upgrading.
Frequently Asked Questions
Q1: Why do apps reload when I switch back to them?
A1: Android kills background processes under memory pressure. Increasing RAM, adjusting background limits in Developer Options, or using Lite apps can reduce reloads.
Q2: Is increasing background process limit safe?
A2: Generally yes on modern devices, but monitor for overheating or battery drain—excessive background apps consume CPU and network resources.
Q3: Will custom ROMs improve multitasking on all devices?
A3: Most clean-base ROMs optimize memory management and remove OEM service hogs, but results vary by hardware and ROM quality.
Q4: Can I automate split-screen launch for certain apps?
A4: Yes—Tasker with AutoTools can open specific app pairs in split-screen on triggers like Bluetooth connect or time of day.
Q5: How do I measure free RAM and background process activity?
A5: In Developer Options, enable Show running processes or use apps like 3C System Tuner to monitor live memory usage and process limits.
Conclusion
Android’s aggressive multitasking limits protect battery life and stability, but they can hinder productivity for power users. By following these 12 methods—from developer tweaks and third-party launchers to split-screen tricks, memory optimization, and custom ROMs—you’ll keep more apps alive in the background, switch faster, and tailor multitasking to your needs. If you’ve maxed out software solutions, consider hardware upgrades or a new device with higher RAM. With the right approach, you’ll overcome Android’s default limits and unlock true multi-app workflows.